
Tips for Making “Sweet Trails”
While this quilt doesn’t exactly fit our pineapple theme, “Sweet Trails” utilizes the sister block of the pineapple - the snail trail. If you’re thinking about making this fun quilt, keep reading for some insights into the pattern before you get started.

This is a wonderfully detailed pattern, although some of the information comes in an odd order. It may not make sense immediately and can seem confusing at times, but keep reading and it will eventually made sense. You will make pieces only to set them aside. Trust the process. Everything will eventually get used.
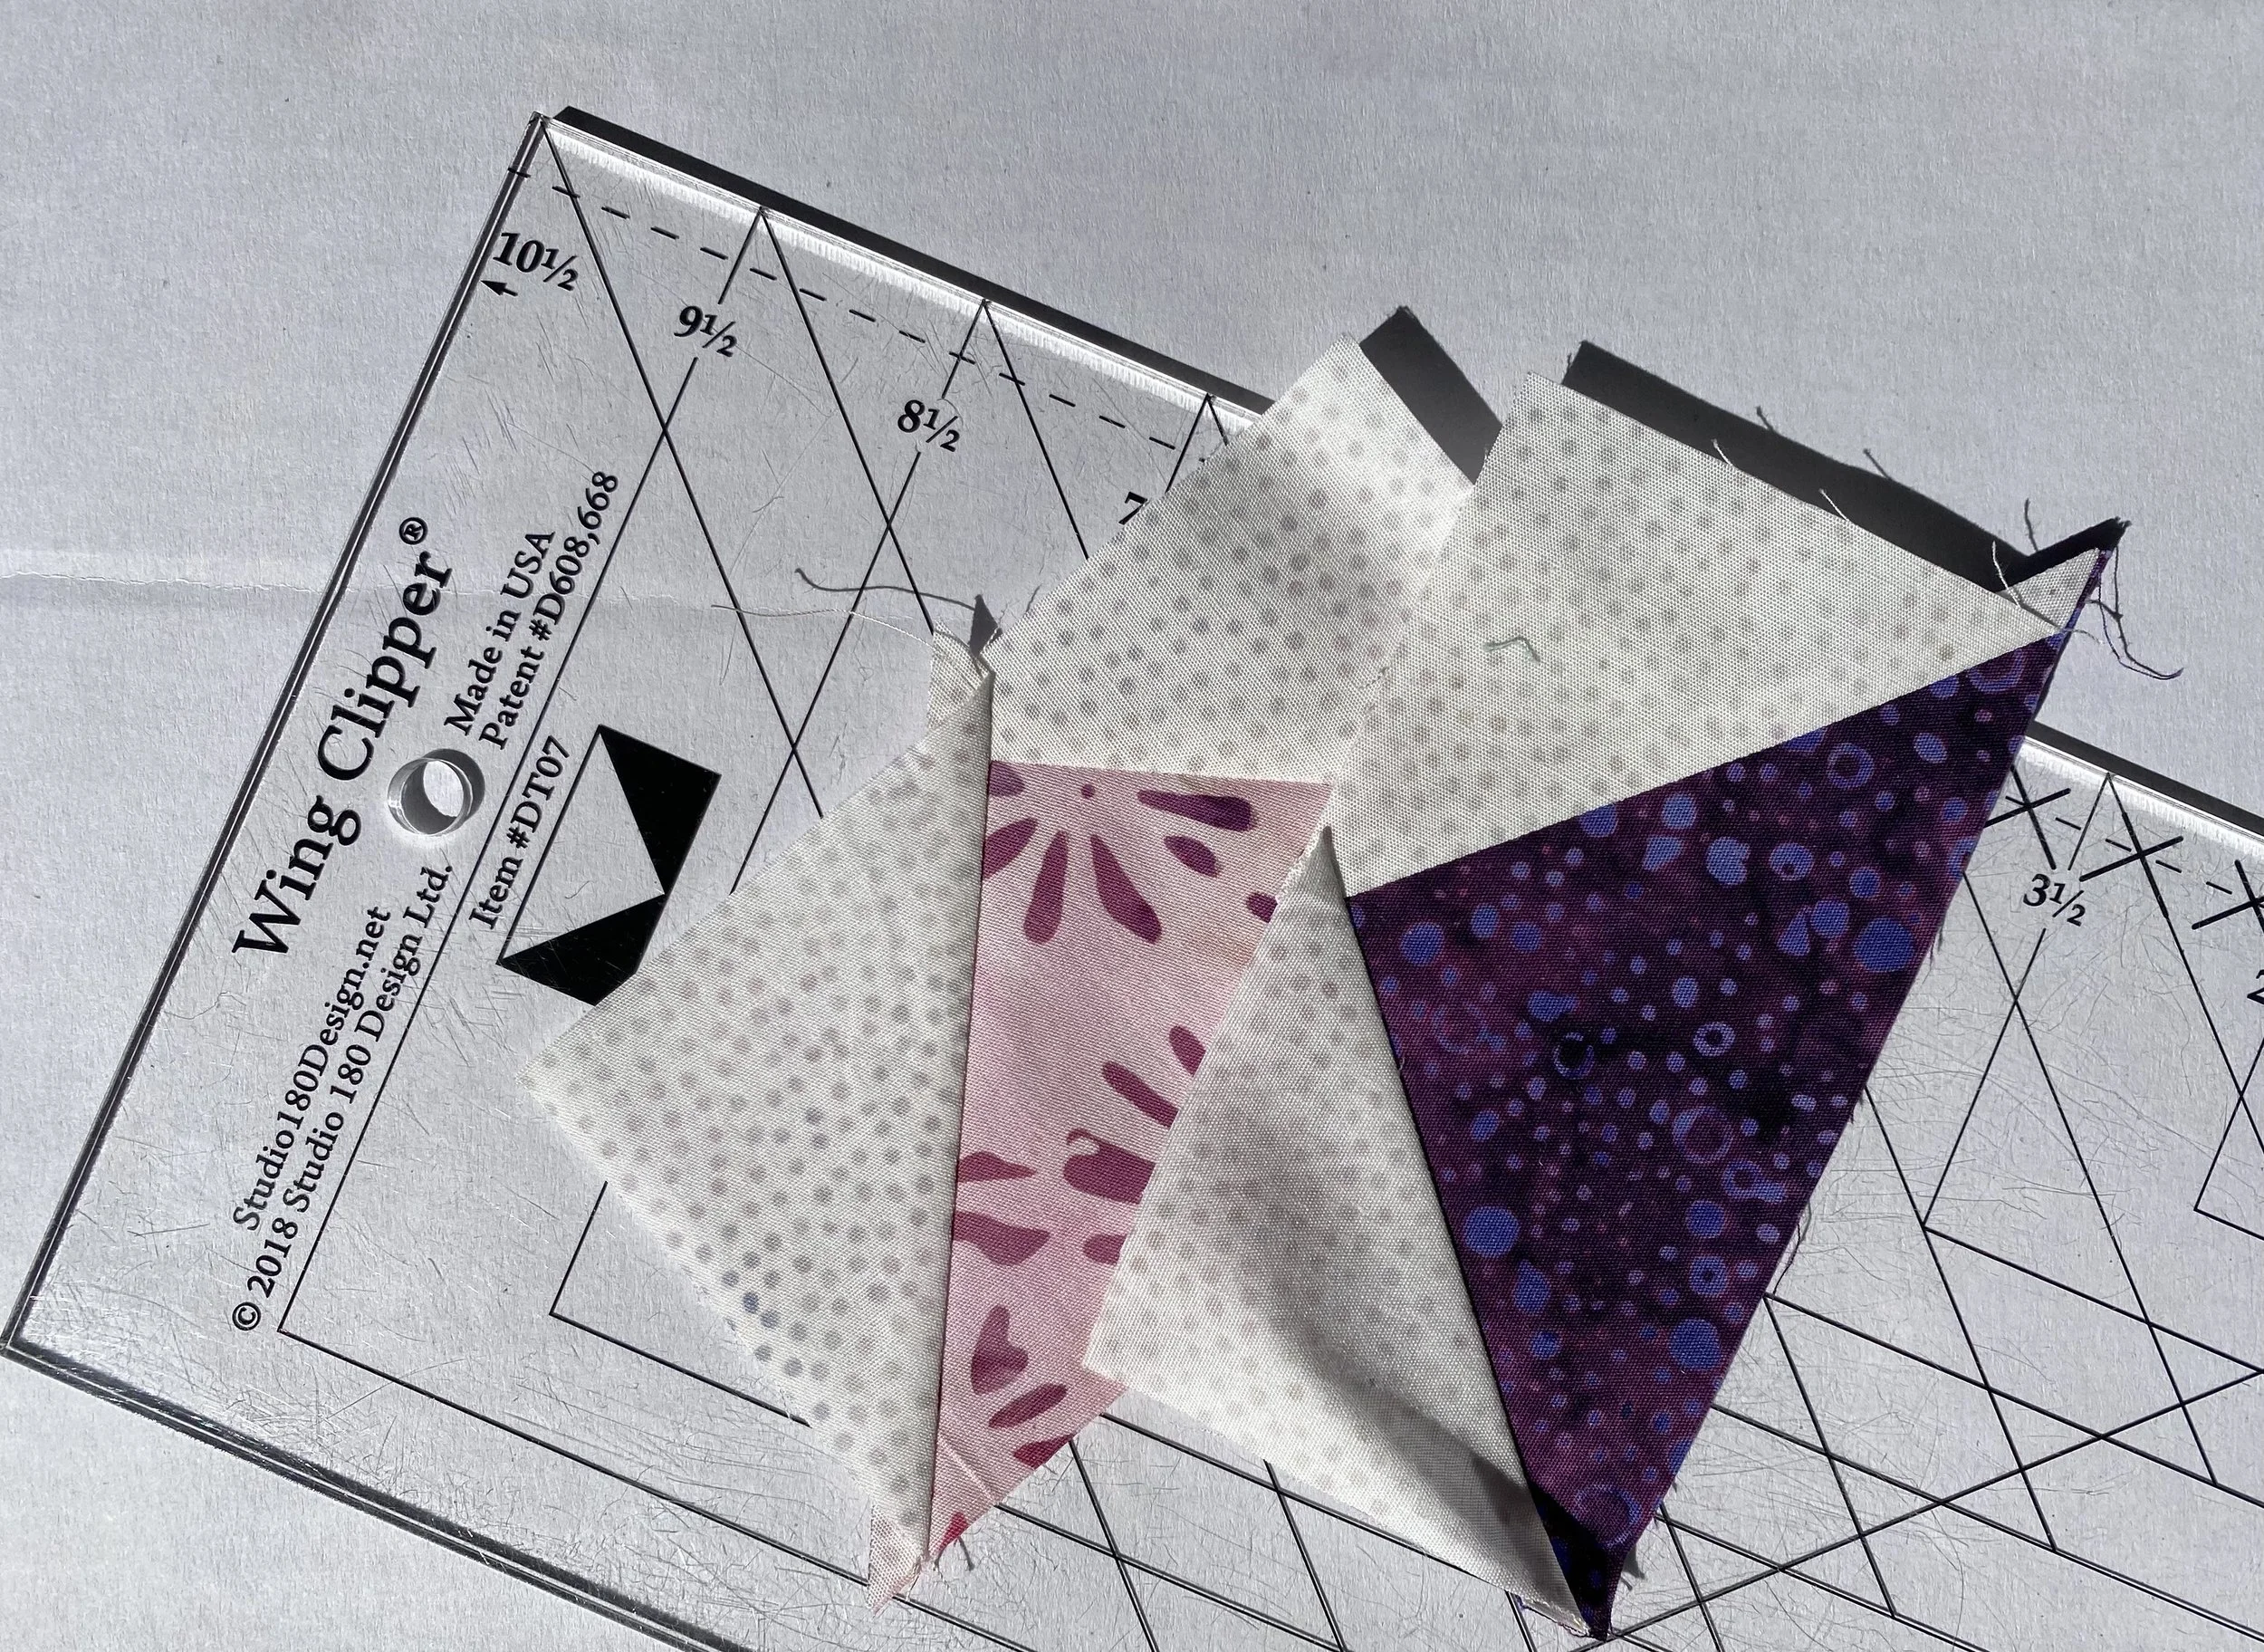
One thing I would change: the size suggested for the flying geese blocks. I prefer to make my flying geese using the measurements provided with the Wing Clipper ruler (even if you don’t have the ruler or prefer a different version, the measurements in the free PDF I’ve linked come in handy!). When I used the measurements in the “Sweet Trails” pattern, my blocks were barely large enough and I had no room to square them. If you don’t like trimming your pieces, by all means leave the pattern as is. But if you’re like me and find your flying geese can get a little wonky without a trim, that extra little bit is your friend!
The pattern has errors on the cutting sheet for pieces B, D, H, and J. The size indicated on the cutting chart is slightly larger than the size when the information is repeated later in the pattern. For D and J, the extra 1/8” didn’t make any difference; either size worked fine for the blocks. Not so with B and H! The extra 3/8” definitely was noticeable. While I could use the larger size instructed in the cutting instructions and just trim the whole block down, my blocks had a nicer finish when I trimmed the pieces down before sewing.
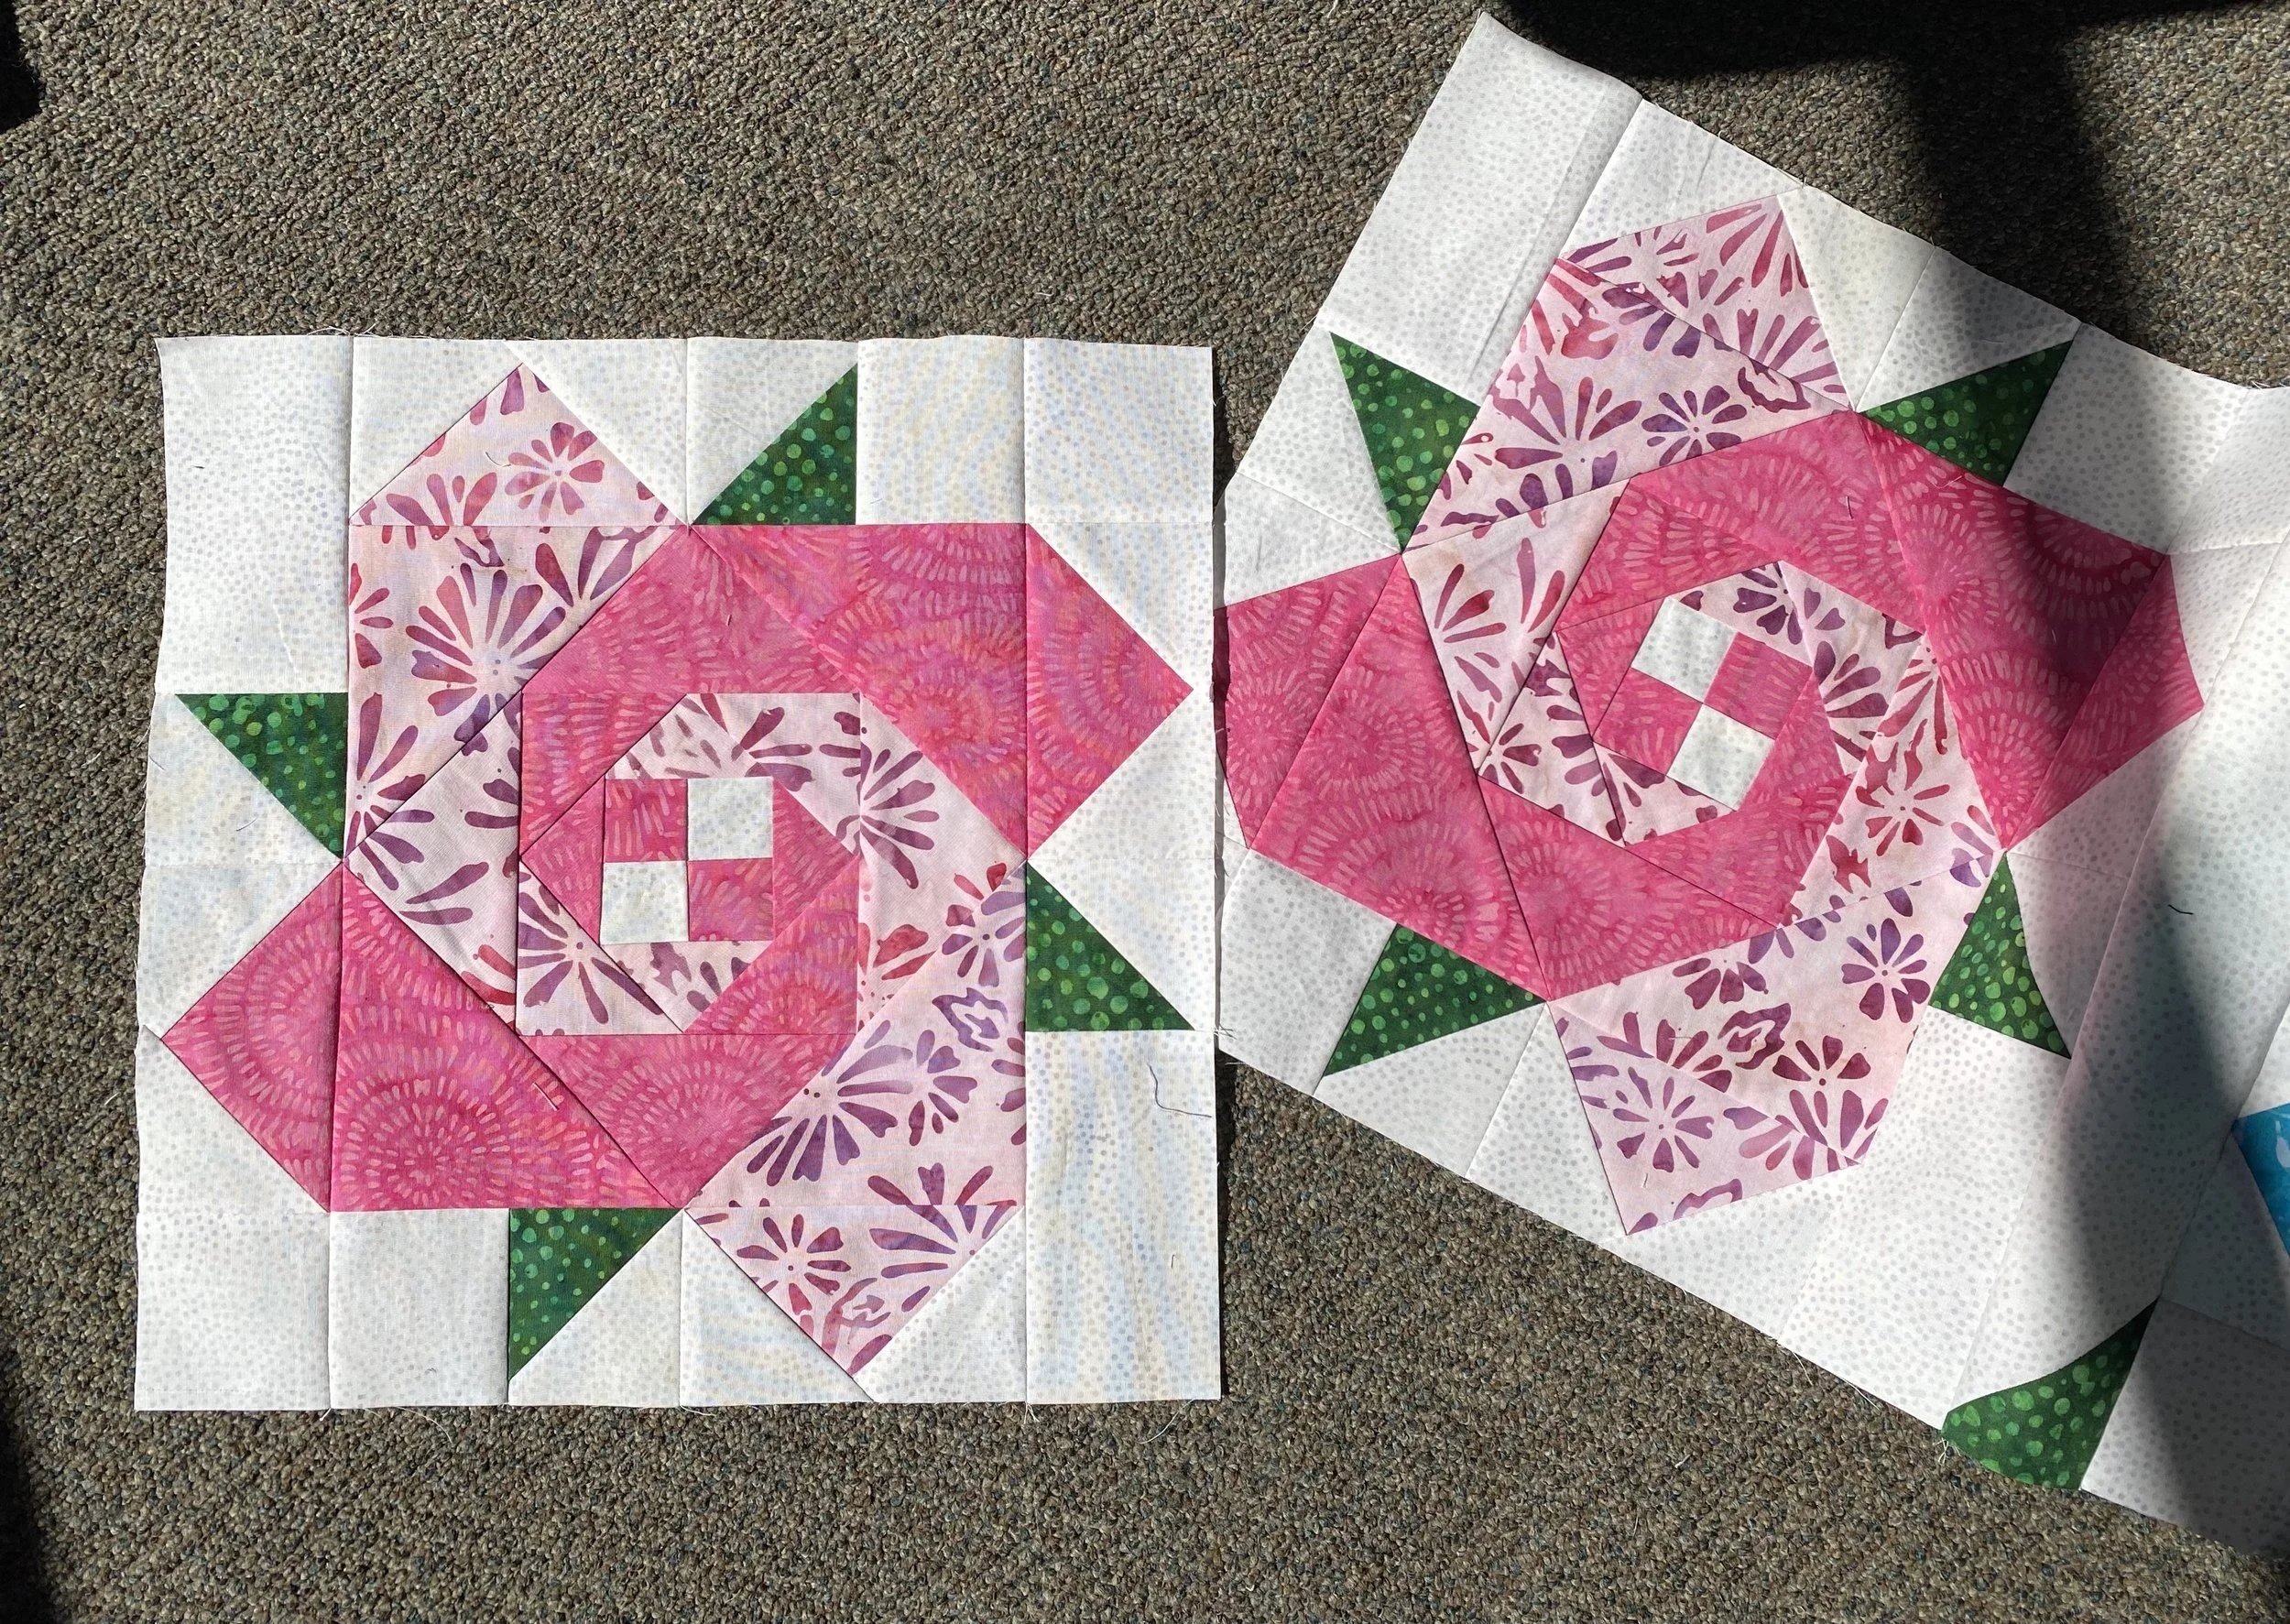
This block is not particularly difficult. I would even say a confident beginner could tackle it. However, do pay attention to the placement of the triangles or you won’t get a trail! (See the block on the left? Oops!) For me, this meant keeping my center 4-patch always oriented the same way (with a white block in the upper left corner) and sewing on the dark triangles before adding the light ones. It gets easier with each piece you add, so pay attention at the beginning and you should be home free.
The way the flying geese and HSTs are added really makes this block blossom into a flower, and the sashing is delightful. Great use of color for a fun finish!
Lastly, let’s talk yardage for different flying geese methods. I mentioned in my demo that I usually rework patterns that use the stitch and flip method so I can use the 4-at-once flying geese method instead. Someone asked, “But how do I know I have enough fabric?” Great question! Let’s look at the difference in yardage each method takes.
Let’s say I’m making 4 flying geese at once. Using the sizes suggested by Deb Tucker’s Wing Clipper directions and making 2x4” flying geese, I need one 5 1/2” square and four 3” squares to make 4 flying geese. From a fat quarter of fabric, I can cut 12 squares at 5 1/2”. That would give me 48 flying geese. However, for my 3” squares, I could only get 42 from a single fat quarter and I need 4 of them for each of the 12 squares. So from 2 fat quarters, using the “no waste” or “fast flying geese” method, I can make 40 flying geese - with a few squares left over from both fabrics.
In contrast, if I’m doing the traditional stitch-and-flip method, I need a 2 1/2 x 4 1/2” rectangles and two 2 1/2” squares for each flying geese piece. From a fat quarter, I can cut 28 or 32 rectangles 2 1/2 x 4 1/2” (depending on whether the print is directional). And for my 2 1/2” squares, one fat quarter will give me 56 squares. Since I need 2 squares for each rectangle, that’s only enough for 28 flying geese units. So no matter which direction I cut my rectangles, I’m not getting more than 28 stitch-and-flip flying geese from 2 fat quarters. I won’t have any squares left, but I may have 4 rectangles to spare.
Clearly the “no waste” method takes less fabric! So the question then becomes, will the cutting layout in my pattern allow me to cut bigger squares? Usually, the answer is yes! (I’ve never yet had a problem! But they say never say never…) The trick is just to adjust the cutting instructions before you start cutting strips. Because once the 2 1/2” strips are cut, you’re not getting a 5 1/2” square…
Hope this is helpful!